
How to Wire Two 12V Batteries for a 24V Trolling Motor
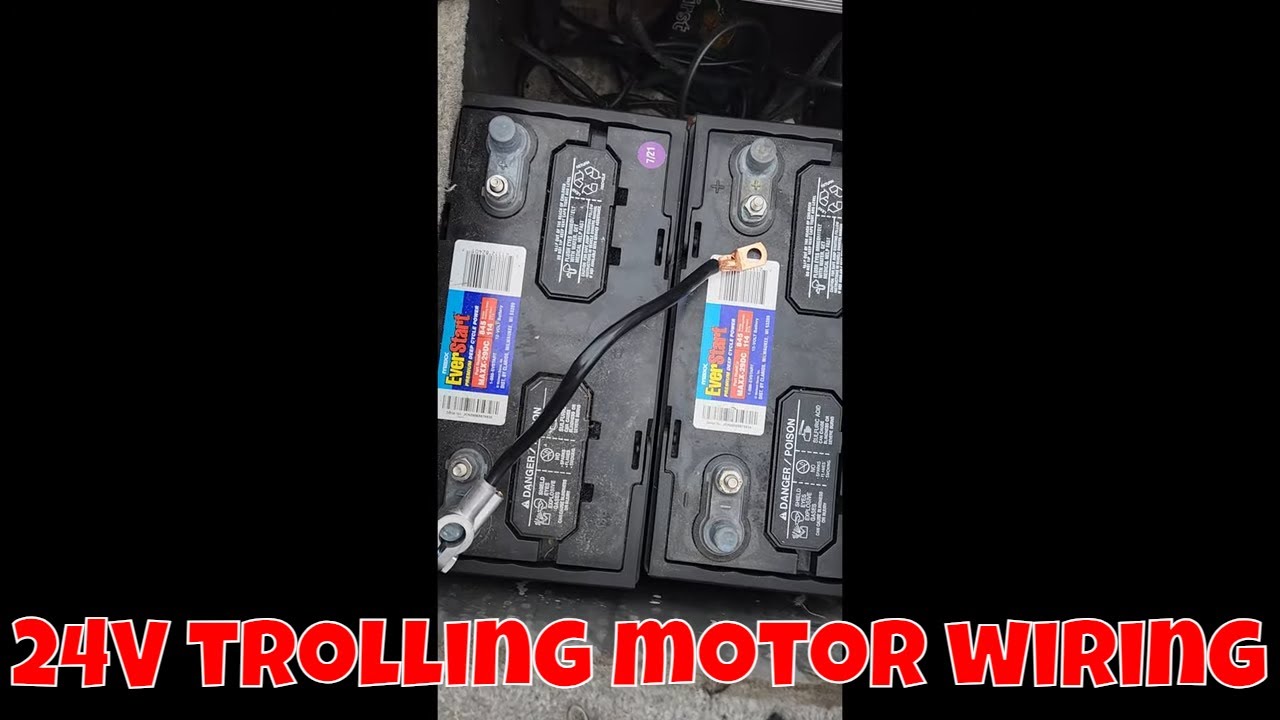
If you’re upgrading a boat from a 12-volt trolling motor system to 24 volts, the 24V trolling motor wiring is easier to understand than it may seem. You don’t necessarily need a complicated electrical setup. In this guide, I’ll show you exactly how I wired two 12V marine batteries in series to run a 24V Minn Kota PowerDrive trolling motor, how I connected the two-bank onboard charger, and what I learned from doing the upgrade on my own boat.
This article is based on the setup shown in our 24V boat battery wiring video, so you can follow along with the real installation.
How Do You Get 24 Volts From Two 12V Batteries?
To make a 24V battery system from two 12V batteries, connect the batteries in series. This is the basic principle behind 24V trolling motor wiring. In a series connection, the voltage adds together while the amp-hour capacity remains the same.
In my setup, I used two EverStart 27DC marine/deep-cycle batteries rated at 114 amp-hours each. Wired in series, they provide approximately 24 volts while retaining a 114Ah capacity rating for the series bank.
Series vs. Parallel Battery Wiring
This is an easy place to get confused because both arrangements use two batteries, but they do very different things.
- Series: 12V + 12V = 24V. This is the arrangement I used for the 24V trolling motor.
- Parallel: The voltage remains 12V while the available amp-hour capacity increases. Two 114Ah batteries would provide a 228Ah bank at 12V.
If you have a 24V trolling motor, series wiring is the arrangement you need. If you have a 12V motor and want more runtime, parallel wiring may be the better arrangement.
How I Wired the Two Batteries in Series
The basic series connection is simple: use a heavy-gauge jumper cable to connect the positive (+) terminal of one battery to the negative (-) terminal of the other battery.
That jumper creates the series connection. The two terminals left open become the positive and negative connection points for the trolling motor.
My 24V Trolling Motor Connections
- Connect the series jumper between the positive terminal of Battery 1 and the negative terminal of Battery 2.
- Connect the trolling motor’s red positive lead to the remaining positive terminal.
- Connect the trolling motor’s black negative lead to the remaining negative terminal.
- The voltage across those two open terminals is approximately 24 volts.
The exact physical orientation of the batteries doesn’t matter. What matters is which positive and negative terminals are connected together and which terminals feed the motor.
How to Connect a Two-Bank Onboard Charger
One of the most important parts of my conversion was changing from the boat’s original single-bank 12V charger to a two-bank onboard charger.
With the batteries wired in series for the trolling motor, each battery still needs to be charged as an individual 12V battery. A two-bank charger lets each battery have its own charging circuit.
Bank 1
- Charger positive lead → Battery 1 positive
- Charger negative lead → Battery 1 negative
Bank 2
- Charger positive lead → Battery 2 positive
- Charger negative lead → Battery 2 negative
The series jumper stays in place while the charger banks connect directly across their respective batteries.
Why I Changed to a Two-Bank Charger
My boat originally had a 12V trolling-motor system with one battery and a single-bank charger. When I upgraded to 24 volts, I needed a way to charge both batteries independently.
Using separate charger banks allows the charger to monitor and charge each 12V battery rather than treating the series pair as one simple 24V battery. That is especially useful for keeping the two batteries at similar states of charge.
What the Finished Setup Looks Like
In the finished installation, the two batteries sit together in the battery compartment. The series jumper connects one battery’s positive terminal to the other battery’s negative terminal. The trolling motor connects to the two remaining outer terminals, while the two-bank charger has one charging circuit connected across each individual battery.
That gives the trolling motor the 24V supply it needs while allowing the onboard charger to charge the two 12V batteries independently.
Testing the 24V System
I didn’t have a meter with me while filming the video, so I didn’t show a meter reading of 24 volts. Instead, I tested the trolling motor and used the built-in battery test indicator on the Minn Kota PowerDrive setup to confirm the batteries were charged.
For your own installation, verify your finished 24V trolling motor wiring with the appropriate meter and follow the wiring, fuse/circuit-breaker, and charging requirements for your specific trolling motor and charger.
A Simple Tip: Unplug the Trolling Motor When You’re Done
One thing I make a habit of doing is unplugging the trolling motor at the boat’s receptacle whenever the boat is not being used. I do this to avoid an unnecessary phantom/parasitic draw on the batteries.
Important Safety Notes
Boat battery systems can deliver very high current. Before working on the wiring, disconnect power and make sure you understand the requirements for your particular trolling motor, batteries, charger, wiring, and boat.
- Use appropriately sized marine-grade wiring and connectors.
- Keep the manufacturer-required fuse or circuit breaker in the positive trolling-motor circuit.
- Make sure battery connections are clean and securely tightened.
- Use a charger designed for the battery configuration you are installing.
- Follow the trolling motor and charger manufacturers’ installation instructions.
Watch the Full 24V Battery Wiring Video
Want to see the actual installation instead of just reading about it? Watch the original OFA video here:
24 Volt Boat Battery Wiring Made EASY for Anyone!
Final Thoughts
For my boat, moving from a 12V system to a 24V trolling-motor setup was a straightforward upgrade once I understood the difference between series and parallel wiring. Two 12V batteries in series provide the 24V supply the trolling motor needs, while a two-bank onboard charger lets each battery be charged independently.
If you’re planning the same upgrade, draw out the connections before you start. For more boat and fishing how-to information, check out our Fishing Tips & How-To section. The key is remembering one simple rule: series adds voltage; parallel adds capacity.




One Comment